- 1 Creating Memes With CapCut Versus Manually
- 2 Step by Step Guide on How to Create Memes With CapCut
- 2.1 Step 1: Log in or Create a New Account
- 2.2 Step 2: Import Media
- 2.3 Step 3: Edit and Customize
- 2.4 Step 4: Add Captions or Text
- 2.5 Step 5: Add Transitions or Effects
- 2.6 Step 6: Fine-tune and Adjust Audio
- 2.7 Step 7: Review and Edit
- 2.8 Step 8: Adjust Timing (for video memes)
- 2.9 Step 9: Preview and Adjust Mobile Optimization
- 2.10 Step 10: Export
- 2.11 Step 11: Share and Publish
- 3 How to Create Memes for Your Website Manually
- 4 Conclusion
Creating Memes With CapCut Versus Manually

Source: CapCut
Memes have become a popular form of communication and humor on the internet. Incorporating memes into your website can help make it more engaging and shareable. In this post we will show you the difference between creating memes manually and using capcut. Let’s dive in!
Step by Step Guide on How to Create Memes With CapCut
CapCut is a popular video editing app that provides users with a wide range of features to create and edit videos, including the ability to create memes. Here’s a step by step guide on how to create memes using CapCut.
Step 1: Log in or Create a New Account
- Open your device browser.
- Search in the search bar for CapCut, a web video editor tool.
- Select the official CapCut tool from the search results.
Step 2: Import Media
- Upon launching CapCut, you’ll be presented with the home screen.
- Tap on the “+” icon to start a new project.
- Choose the appropriate aspect ratio for your meme (typically 16:9 or 1:1 for social media).
- Tap on the “Media” option and select the desired image or video from your device’s gallery.
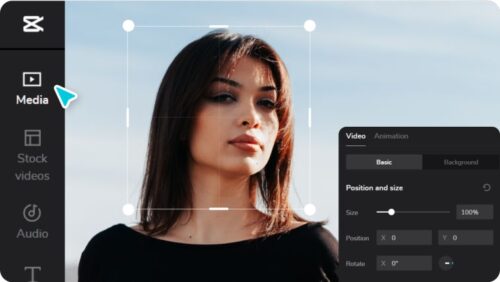
Step 3: Edit and Customize

Source: CapCut
- Once the media is imported, you can begin customizing your meme.
- Tap on the imported media to select it.
- Use the available tools to add text, stickers, filters, or effects to your meme.
- Adjust the size, position, and font of the text as per your preference.
- Explore the various options and experiment with different effects to make your meme stand out.
Step 4: Add Captions or Text

Source: CapCut
- Tap on the “Text.”
- Choose a font style that suits your meme’s tone and theme.
- Type in the desired text or caption for your meme.
- Adjust the size, position, and color of the text as needed.
Step 5: Add Transitions or Effects
- CapCut offers a range of transitions and effects to enhance the visual appeal of your meme.
- Tap on the “Effects” option in the editing menu.
- Browse through the available options and select a transition or effect that complements your meme.
- Adjust the duration or intensity of the effect as desired.
- Preview the meme to see how the transition or effect enhances its overall impact.
Step 6: Fine-tune and Adjust Audio
- If your meme includes audio, you can make adjustments to ensure clarity and coherence.
- Tap on the “Audio” option in the editing menu.
- Adjust the volume levels of the original audio or add background music.
- Trim or split the audio clip if necessary.
- Preview the meme to check if the audio effectively aligns with the visual elements.
Step 7: Review and Edit
Source: CapCut
- Once you’ve added all the desired elements to your meme, take a moment to review it.
- Watch the meme from start to finish, paying attention to the timing, text readability, and overall humor.
- If any changes or refinements are needed, return to the respective steps and make the necessary adjustments.
- Repeat the review process until you’re satisfied with the final result.
Step 8: Adjust Timing (for video memes)
- If you’re creating a video meme, ensuring that the timing of the visuals and text aligns well with the humor is crucial.
- Play the video meme and carefully observe the timing of the text overlays or punchlines.
- Use the “Cut” tool to trim or adjust the duration of specific clips if required.
- Fine-tune the timing of text animations or transitions to maximize the comedic effect.
- Preview the meme multiple times to ensure the timing enhances the humor and impact.
Step 9: Preview and Adjust Mobile Optimization
- Consider the viewing experience on mobile devices, as many users access websites through their smartphones.
- Play the meme on a mobile device to check for any text or visual elements that might get cut off or appear differently.
- Adjust the text’s size, position, or font if needed to ensure readability on smaller screens.
- Make any necessary tweaks to optimize the meme for mobile viewing.
- Use a background remover to ensure you achieve the best background before you export it.
Step 10: Export
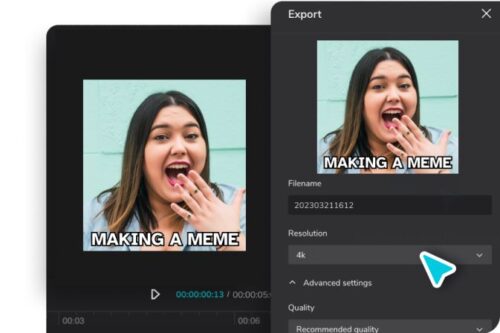
Source: CapCut
- Once you’re satisfied with the editing, tap on the play button to preview your meme.
- Make any final adjustments if required.
- Tap on the checkmark or export icon to save your meme.
- Choose the desired resolution and quality settings for the exported meme.
- Wait for the export process to complete.
- Once the export is finished, your meme is ready to be shared or published on your new website.
- Locate the exported meme in your device’s gallery.
- Depending on your website’s platform, upload the meme as an image or embed it as a video.
- Share the meme on social media platforms to increase engagement and drive traffic to your website.
How to Create Memes for Your Website Manually
Creating memes for your website manually involves combining creativity and design skills. Here’s a step-by-step guide on how to create memes for your website:
Step 1: Identify the Meme Format
Memes often follow a specific format or template. Familiarize yourself with popular meme formats by browsing meme websites.
Step 2: Define the Message
Determine the message or joke you want your meme to communicate
Step 3: Select Suitable Images
Find images or photos corresponding to your meme format and complement your message. Make sure the images you choose have the necessary permissions for reuse.
Step 4: Create your Meme
Open the selected images in your editing software and start manipulating them to fit your meme format.
Step 5: Save your Meme
Once you’re satisfied with your creation, save the meme as an image file format.
Conclusion
Creating memes for your new website can be a fun and effective way to engage your audience and promote your brand. While manual creation methods have their merits, CapCut provides a more accessible, convenient, and efficient way to create memes. Its user-friendly interface, rich editing features, built-in effects, and seamless sharing options make it an excellent tool for individuals looking to create engaging and shareable meme content.


